Manage Employees and Permissions
To help businesses easily manage when multiple employees use the system, effective from September 4, 2025, the system updates role-based access control with the following principles:
- - Each employee is assigned the right role according to their job position.
- - Each role has detailed permissions, ensuring every employee performs only the tasks they are authorized for.
- - Centralized, safer, and more transparent employee management for the business.
1. System Roles
The system provides several default roles you can use immediately without creating them from scratch. Each role is designed to match practical needs in a business and is fixed; therefore, you can only view the role’s detailed permissions and cannot edit the role itself.
- - Administrator (Admin): Full system access. For senior managers; can create/edit roles, assign permissions, and manage all data and employees.
- - Event Staff: Suitable for employees responsible for organizing and managing events. Needs only view and event-related actions; no access to sales or administration.
- - Sales Staff: For employees working directly with customers, handling quotations and related operations. Focuses on customer transactions without interfering with system administration.
- - Store Manager: Manages store operations. Has full permissions related to the store(s) they oversee.
- - Procurement Staff: Suitable for those in charge of purchasing and working with suppliers. Permissions center on managing inbound RFQs and tracking transactions with suppliers.
2. How to Create Additional Roles in Your Company

Step 1: Go to the Role Management screen
- - Go to Company Management → select Employee & Permission Management.
- - Select the Role Management tab.
- - Click + Add Role.
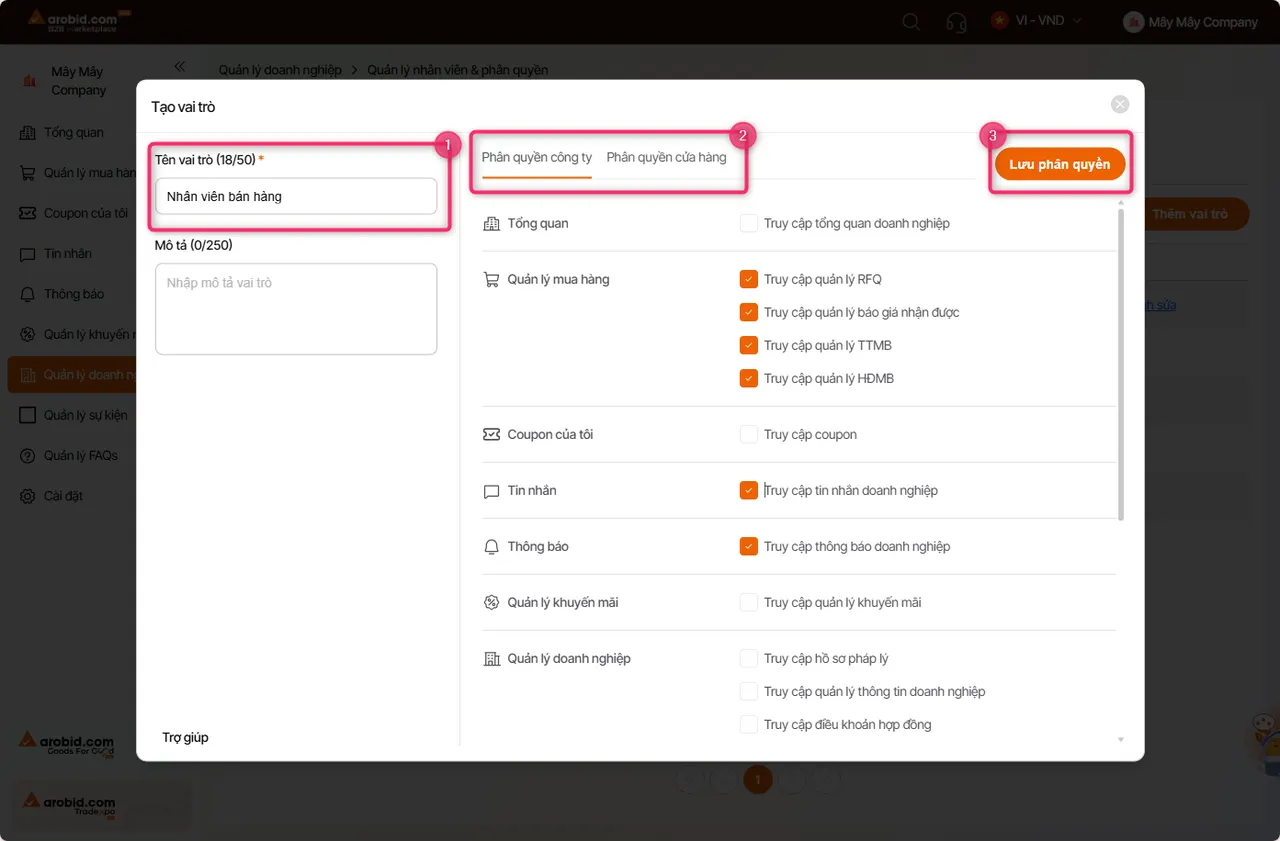
Step 2: Create and save the role information
- - Role name: Enter a clear, descriptive name that reflects the function and does not duplicate existing role names (e.g., “Sales Staff,” “Store Manager”).
- - Description (optional): Enter the role’s purpose or scope.
- - Select permissions: Choose the system permissions that allow employees assigned to this role to perform specific functions (e.g., Overview, Purchasing Management, My Coupons, ...).
- - Save role permissions: Review the role’s permissions, then click Save permissions to finish creating the new role. The new role will appear in the list and can be assigned to employees.
Notes
- - Each company can create multiple Custom Roles to fit organizational needs.
- - Custom Roles can be updated but cannot be deleted.
- - Avoid creating role names that duplicate existing system roles.
- - After adding a role, you must assign it to employees for it to take effect.
3. Add New Employees to the Company
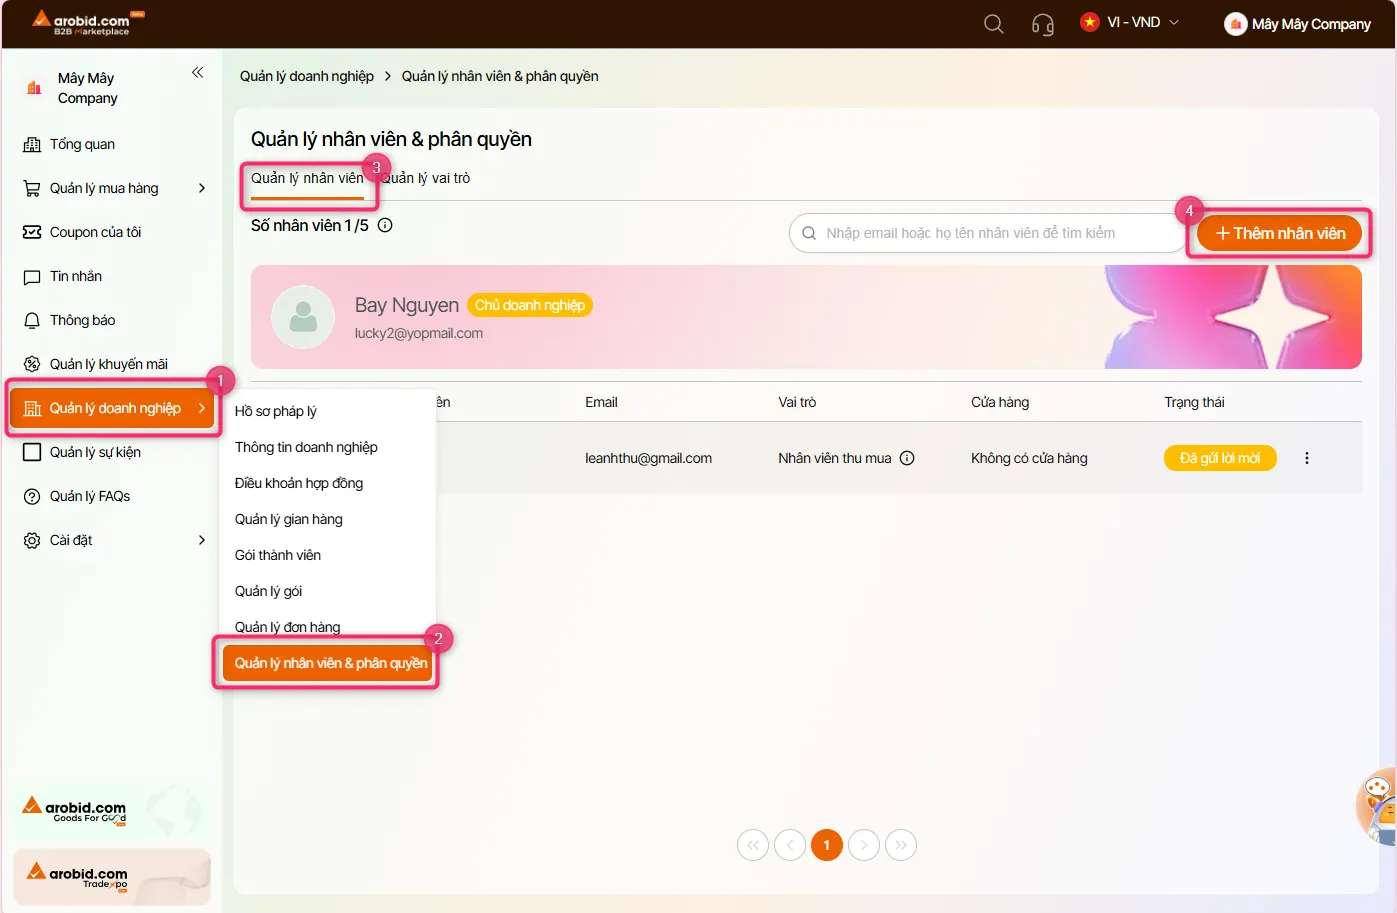
Step 1: Open the employee list for your company
- - Go to Company Management → select Employee & Permission Management.
- - Select the Employee Management tab.
- - Click ➕ Add Employee (top-right corner).
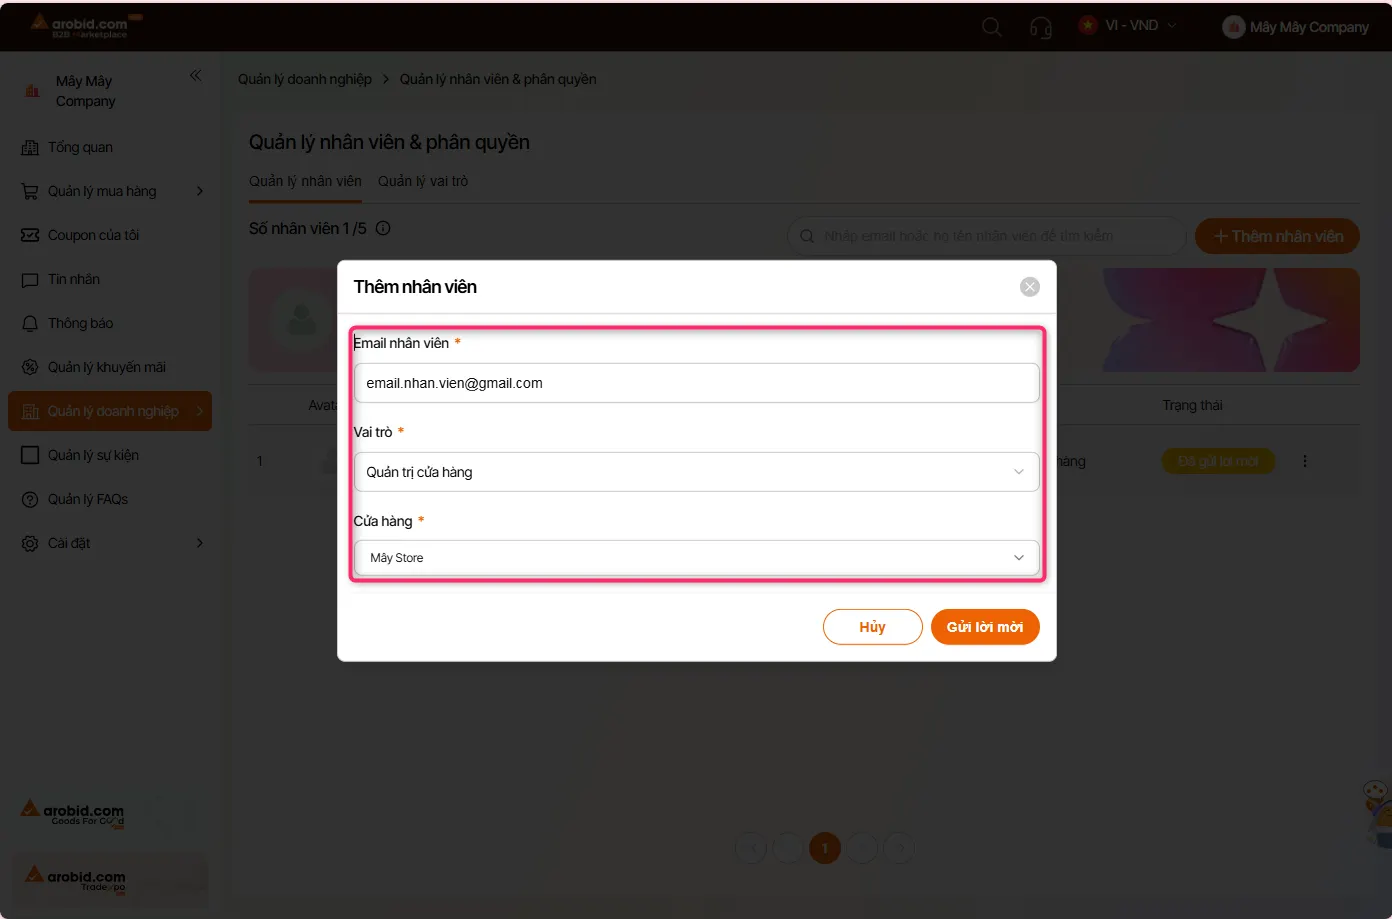
Step 2: Enter employee information
In the Add Employee window, fill in the 3 required fields:
- + Enter the email of the employee you want to invite.
- + The system will send an invitation email.
- + Note: The email must not have created a company before and must not currently belong to any company as an employee.
- - Select role
- + Choose an appropriate role from the list (e.g., Store Manager, Sales Staff...).
- + The role determines the employee’s permissions in the system.
- - Select store (if the role involves store-related permissions)
- + Choose the store where the employee will work.
- + If your company has multiple stores, you can assign the employee to one or more stores.
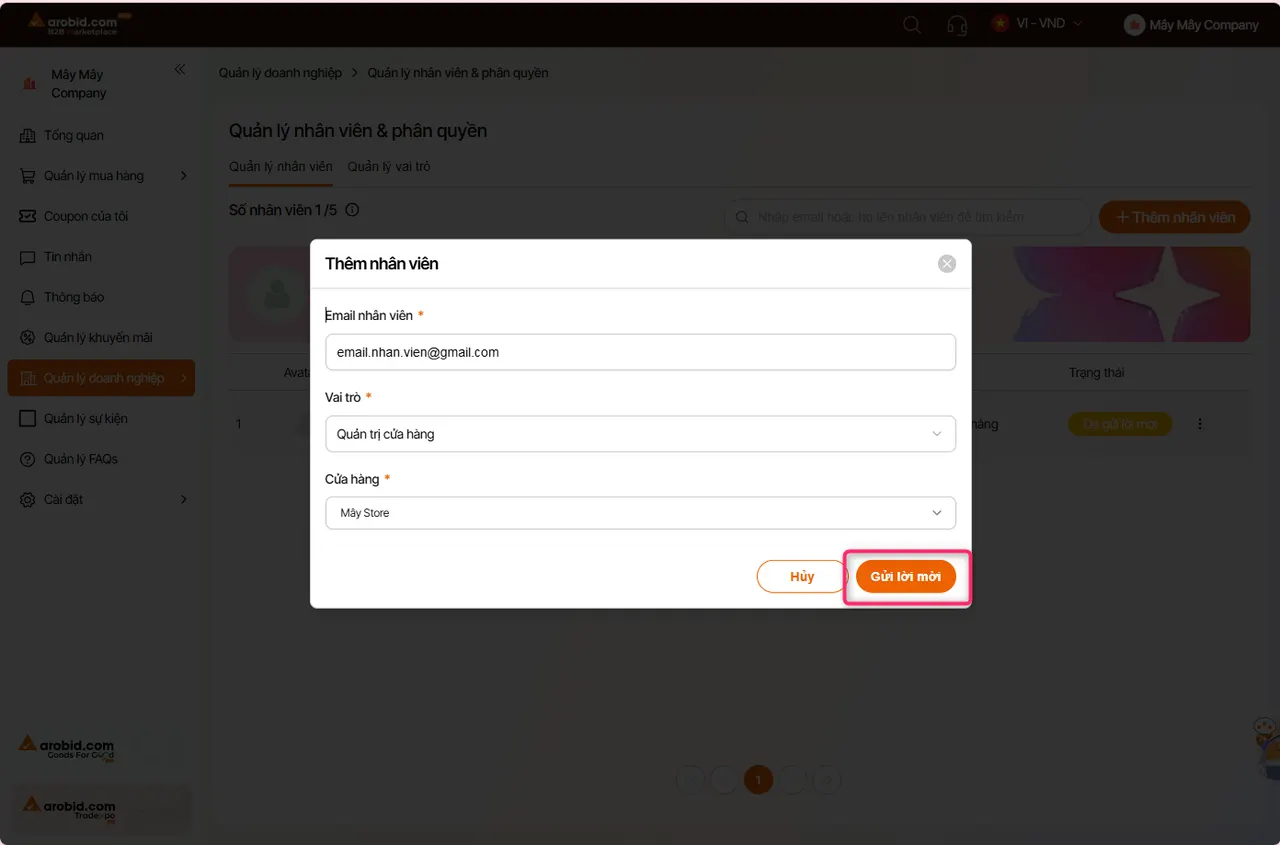
Step 3: Send the invitation
- - After entering all information, click Send Invitation.
- - The system will send an invitation email to the employee.
- - The employee just needs to confirm via email to join the system.
Step 4: Return to the Employee Management list
- - After inviting, the employee will appear in the list with one of these statuses:
- + Active: The employee has confirmed and joined the company.
- + Invitation Sent: The employee has been invited but has not confirmed joining the company yet.
Notes:
- - Make sure the employee’s email is correct so they receive the invitation.
- - You can edit an employee’s role or store assignment after adding them.
- - The invitation email is valid for 72 hours. You can resend the invitation if the employee hasn’t confirmed in time.
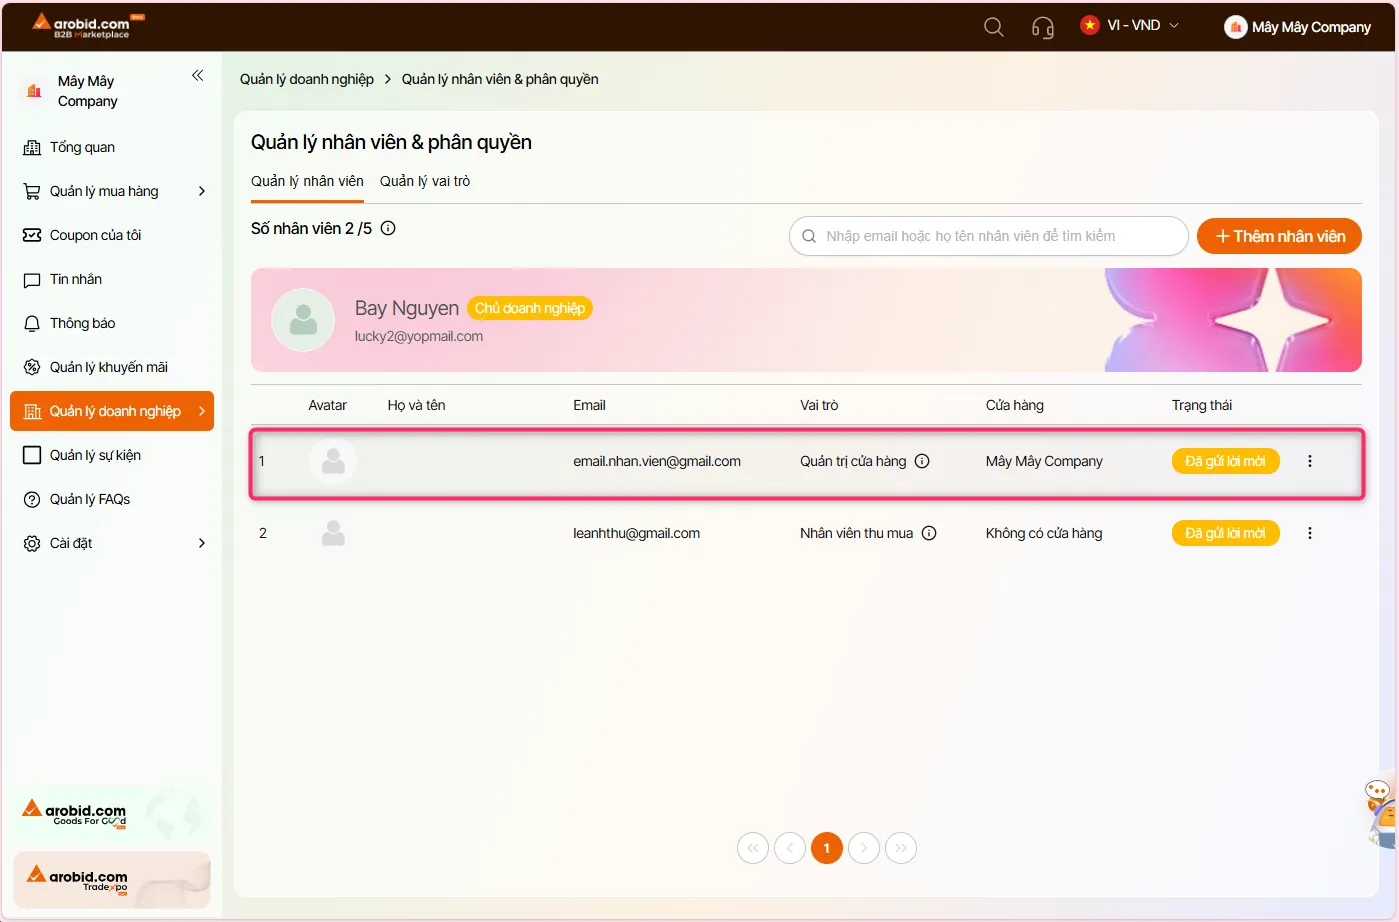
4. Remove an Employee from the Company
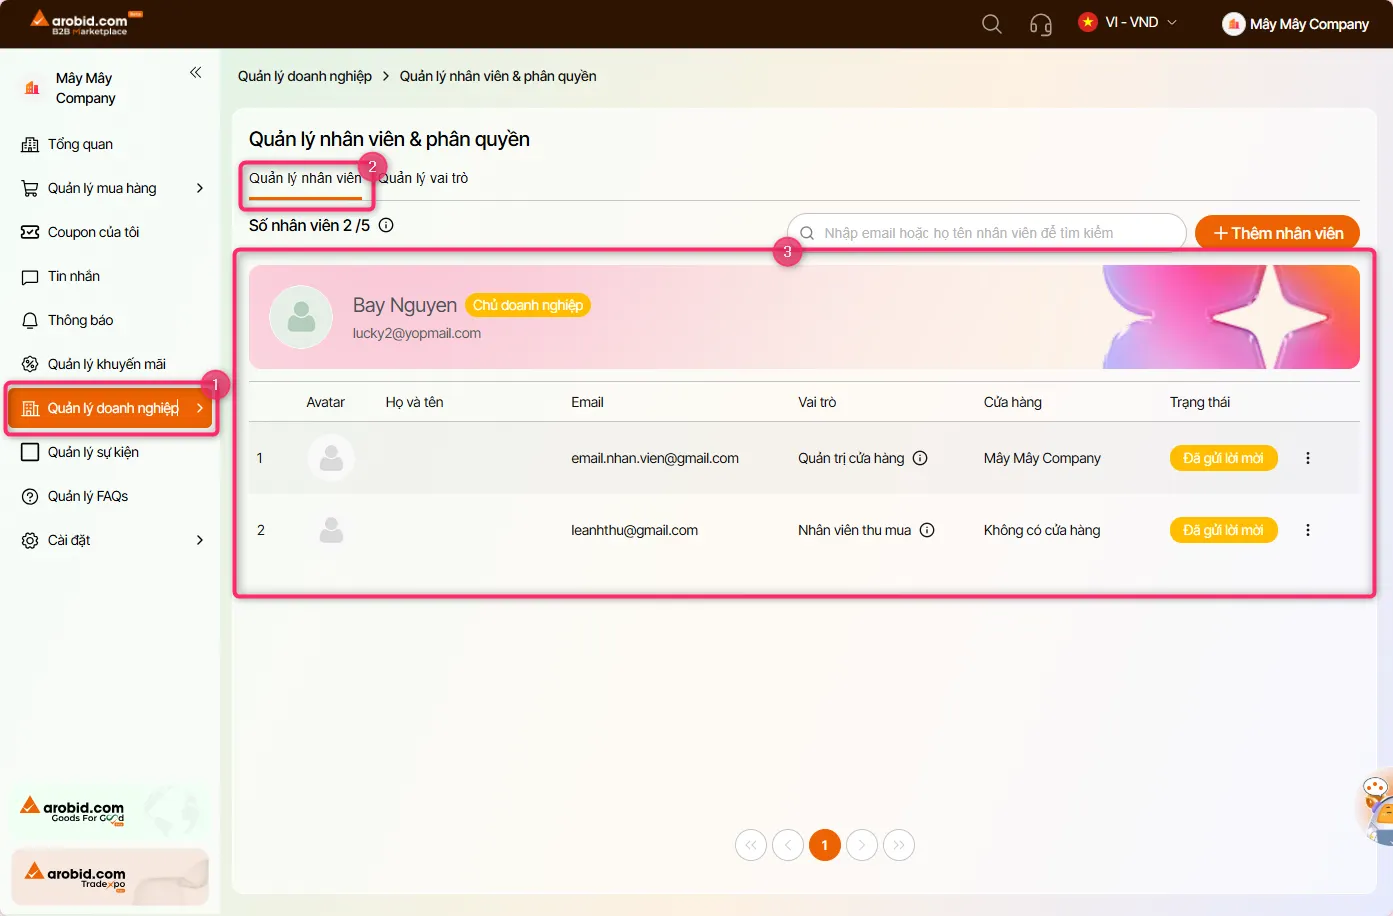
Step 1: Open the employee list
- - Go to Company Management → select Employee & Permission Management.
- - The screen will show all employees who have been added to the company.
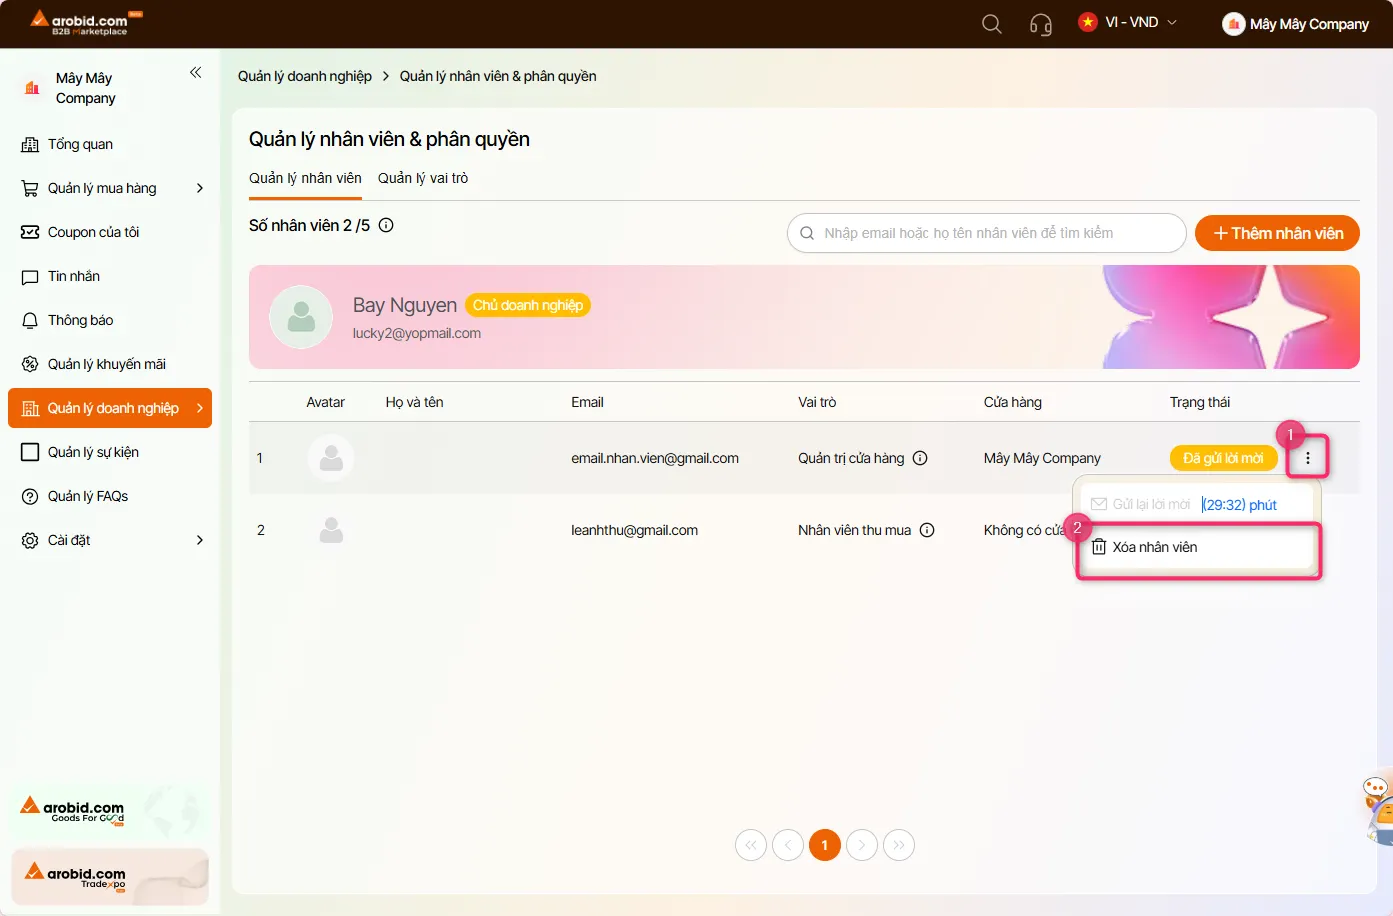
Step 2: Select the employee to remove
- - Find the employee in the list (by email or name).
- - Click the three-dot button (⋮) in that employee’s Status column.
- - From the menu, select Remove Employee.
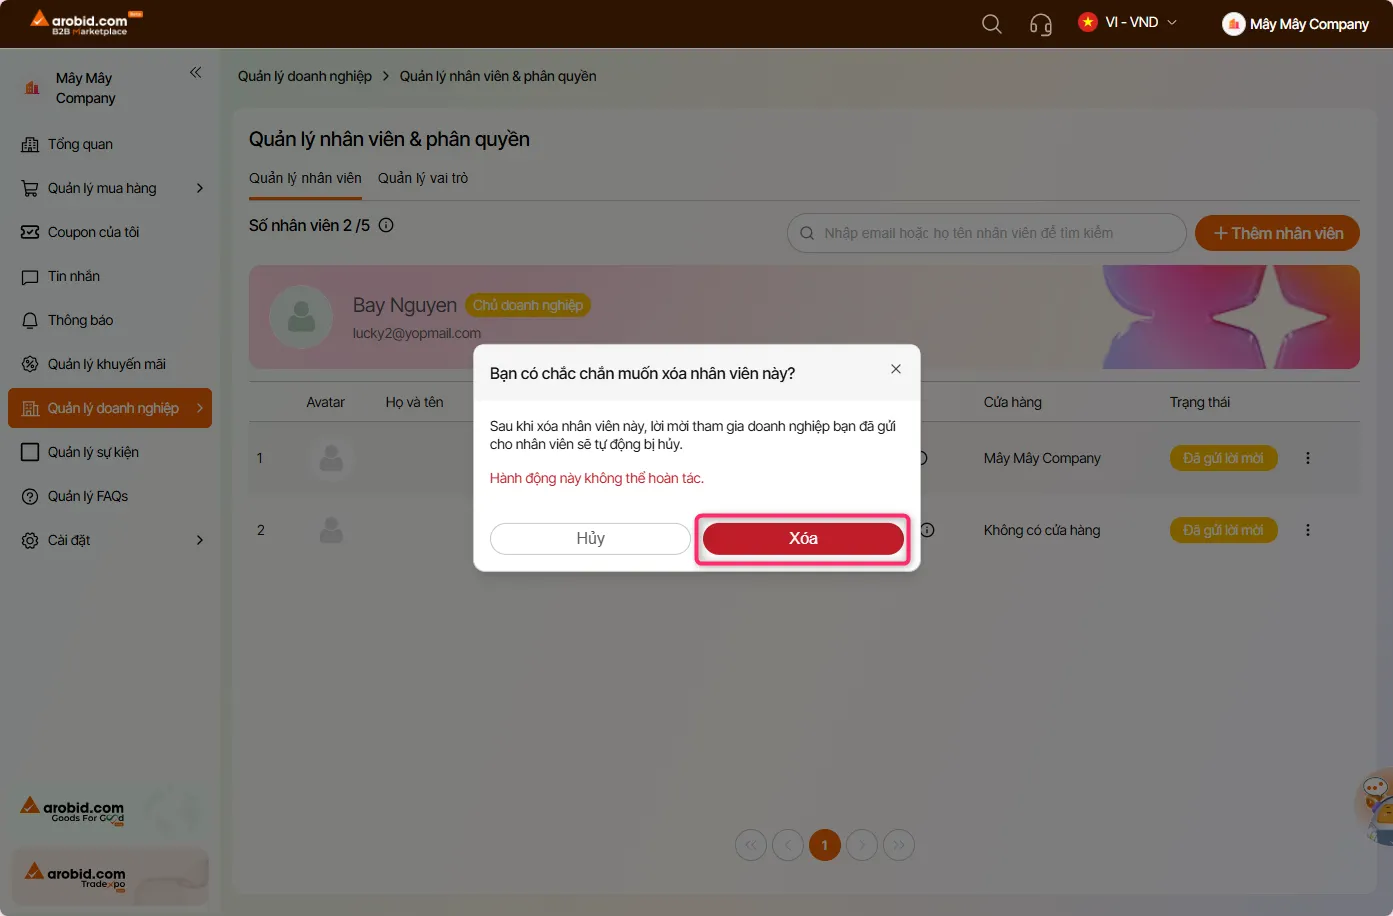
Step 3: Remove the employee
- - Confirm the removal action.
- - After removal, the employee will no longer have access and will no longer be managed in the company.
Notes
- - A removed employee can be added again later if needed.
- - If the employee still has a pending invitation with the status Invitation Sent, removing the employee will also cancel that invitation.